Saturday, April 28, 2018

Sharpes Practice AWI 28mm

We pulled out the 28mm AWI models because of a scheduling issue. The night was supposed to be a Indian Mutiny but it turned into a wonderful game of Sharps Practice set in North America circ 1778. The game was played over 2 week nights on back to back Tuesdays.
The British force tasked with escorting a wounded officer and prisoner to a outpost had to make it across the board. Their force included
  1. A level three leader commanding 2 groups of regular line.
  2. Another leader level two with 2 groups of Light Infantry
  3. A level one  leader with a group of skirmishers
  4. A level one leader in-charge of the wagon and prisoner

The American force was a bit larger but mostly less quality it did not have milita so famously undependable in the revolution though. Their force was as follows. 
  1. One Level 3 leader with 3 groups of Continental infantry
  2. Two groups of State line infantry with a level 2 leader
  3. A level 2 leader with a skirmish unit of Riflemen and a Sharp Shooter
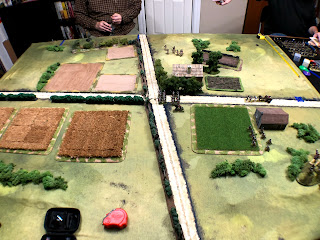
The action was played on a 6x4 table with mostly Perry miniatures and buildings and terrain from our collections.

The British were not aware of the location of the American deployment areas and that led the dispersment of the light infantry. The cart with the wounded office and prisoner moved slowly up the road. The Americans were able to come on in several groups and jumped on the skirmishers pretty quickly driving them back onto the British Line infantry.

The Americans felled a bunch of lumber across the cross roads and Brits had a hell of a time clearing with the Riflemen and Continentals pouring fire into them. Once the road block was cleared the British had to fall back under the hail of musketry. The Riflemen called forth their sharp shooter but he could not hit the stalwart British officer who would spend his next few activations removing shock and trying to bring the Regulars into some kind of fighting shape after the opening fury fire. 
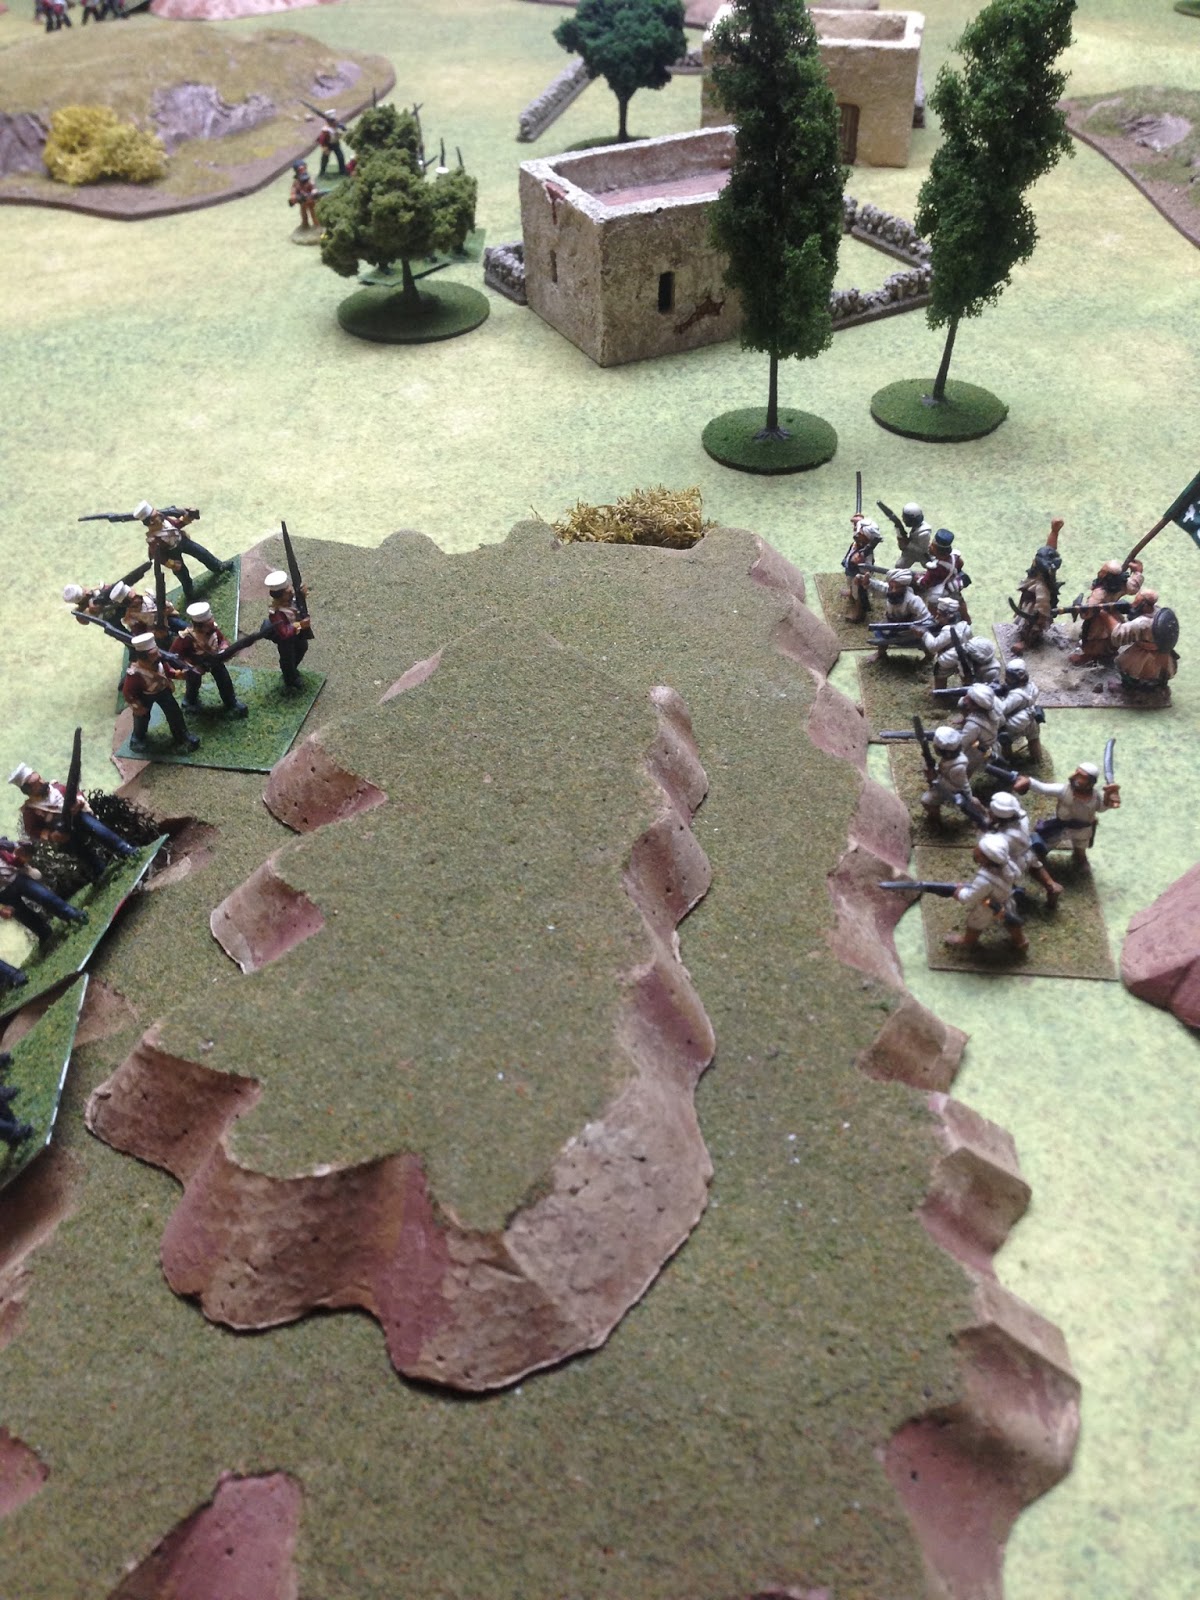
While the British Regulars were falling back in disorder the American State line troops push towards their flank. They battered a small skirmish group badly and those skirmishers that remained took cover in a farm house adjacent to the cross roads but shielded from the action there by a thick row that we would call a over grown wind break. The British also dispatched a second group of light infantry to engage the American State line troops and they quickly got them self dugin around a pigsty and would bring the Americans on this side of the action to a stop with telling musketry. 
On the far flank the third group of British Skirmishers moved to flank the American Riflemen and as the Riflemen bound forward to assist the stymied State Line troops they left the American Continental formation that had pushed towards the cross roads exposed to a aggressive set of actions by the Brit Skirmishers. 
The fighting at the cross roads became intense as the British Regulars used the confusion in the Continental formation caused by the flanking fire to get their act together. If it had not been for the American Riflemen moving forward to melee the Cart guards and capture the prisoner and wounded officer a game that started as a disaster for the British might have ended with the Americans snatching defeat from the jaws of victory.


Friday, January 5, 2018

28mm Johnny Reb Oct 2017

Some 28mm Images from a Johnny Reb Game.  On Oct 3rd 2017. Having never played JR with anything other than 15mm miniatures I was able to convice a few friends to try it with our 28's.

There was lots of rule reviewing so the pictures did were not high on the list of things to do but I did snap a few.


Monday, December 28, 2015

A Sharpe Action in Wiggiam Valley


A Sharpe Action in Wiggiam Valley


The game was played using Sharpes Practice Indian Mutiny Variant called War without Mercy. None of the players had played Sharpes Practice but have played IABSM(I aint been shot mum) produced by TwoFatLardies.

 On with the story. Word has come from Indostan Civil Service that a abandoned border station at the entrance to Wiggiam Valley on the Northwest Frontier might have become a way station for raiders. Clearly this cannot stand so a request is made for a small detactment of HEIC troops to investigate. The orders are to determine if there is truth to these rumors and if so establish a military presence at the station if not practicable, fire any remaining building to denie usage to hostile raiders. 

Captain Blysabe was tasked with the mission he requested SGT Peachy to assist as Peachy had knowledge of the area. Medical Officer Dr. Watson was sent along to tend to natives encountered in route. HEIC doctors carry large medical kits to assist natives while in the field and Watson is know as an avid hunter who would enjoy some sport along the way. He also possesses an excellent eye for detail and a keen mind.

In terms of the game we had Blysabe a lvl 3 Big Man (BM), Peachy a lvl 2 (BM) with a spotting bonus and Dr. Watson lvl 1 (BM), 3 groups of 12 Sepoys with each group including a Chosen Man with a Baker Rifle, who may be called forth to make any special shots requested. 

The Ango-Indian player is unaware that the site he is heading to has been in use for sometime by a local raider and neer do-weller named Sha Sugun and one of the remaining builds at the border station has become a vault for some of his misbegotten booty. 

Sha Sugun had become aware the HEIC advance towards the valley and has gathered what forces he could to drive them off. He needed time to gather camels and bullocks to empty his loot. 

5ft by 7ft table played length wise. The pictures below show the lay out. Hills are rough ground and provide cover.


The Raiders force set up in Blinds and the HEIC moved on to the field of battle and was wary of ambuscades. After action reports will show they deployed along to much of an extended front.While not keeping in standard spacing.


 As you can see in the above picture the center group lead by Peachy pushed far ahead of the flanking groups. This turned out to be a poor choice as it left them exposed to a light cannon and incessant musket fire. As the flanking groups made contact the center group was exposed to cannon fire and not positioned to support either flank. 

Cannon cover central approach
Left flank lead by Blysabe himself is ambushed to little effect, 


Dr. Watson encouters troops led by the Great Raider, Sha Sugun with his banner.
We played it that the edge of the hill provided cover and allowed firing over the hill. Without being against the edge the models troops would be in the open. 

The spotting attempts by Peachy in the center to see the flank forces were terrible, however the flank leaders did well and cleared a few blinds cause a little early commitment for the Raiders. 


Blysabe at the charge.
2 to 1 fighting but a Hero of the Empire Blysabe keeps the Sepoys in it and prevails


The battle line.
Dr. Watson holding the hillok above is in to deep. He only came to treat wounded and provide assisant to natives. Clearly holding a battle line is beyond his mandate and his Sepoy group is clearly made of stern stuff. 

If you look closely at the battle line picture you will see the center group of Sepoys is without Peachy. Cannon shrapnel put him out and combine with musktry from Sha Sugun's group drove his group of Sepoy out of the fight. 

On the far end of the table Blyasbe pushes his group hard and breaks to two groups facing him, in the Melee the mounted raider commander (Nana Mohamed) is dismounted. Mohamed's horse barrels through the Sepoys and throws him but he is able to recover his wits, dust himself off and make it around Blysabe's troops and back to his troops, sans his mount. Also with much hooting and cheering for all in attendance.

Blysabe and his Sepoys frustrated their efforts where for not

Broken raiders falling back from Blysabes fury

Dr.Watson orders his troops back and sprints to the building to set it ablaze
Dr.Watson see's the end is near and orders a retreat for the men. he then heroically rushes one of the buildings and attempts to light it ablze giving the men time to fall back and some cover in the smoke.

 In the end all had fun and it was agreed that the HEIC troops did not form up as needed to over come the force arrayed against them. Blysabe will step up his patrols along the border and has assured Dr. Watson his bravery and cool head will have a prominent place in the dispatch regarding the hot action at Wiggims Valley.


Friday, December 11, 2015

December 2013 we began a campaign that would not be a campaign, it never gets past this one good kick off game. Like so many groups of gamers we always want to be playing the long running campaigns that include epic actions and heroic deeds. The group has done 2 such campaigns set in WW2, the American and German campaigns respectively. But thats a story for another time...Let me tell you about the pictures below. Nice story starts the game. Earth has lost contact with its settlements on Mars, several nations has settlements and none are in communications with earth. A large amount of science was used to dirt ermine that as a small group of United Nation space mobile peace keepers we could either head to Mars or to the space station that is used as a alternative path of communication between Mars and Earth. (Like Mars and Earth loose site of each other for a while in our dance around the sun and so we will build a floating a cell tower in space). So our over all commander "me" decided that starting to Mars to get feet on the ground and assist in whatever way was needed was the best plan. Before we left lots of loading of the boat was done. It was agreed that we would be aboard the "SandPebble" and we chose how to staff the ship and what equipment we would be taking into space. Since it's a miniature war game we clearly needed to load up on humanitarian items. Which we would take up in space, haul across the galaxy and be of little use if we got to Mars and found an uprising or Alien invasion. We hit the ground of Mars and drop via VTOL craft to the planetary communications array. While in our drop with sent a squad to monitor the CHICOM facilities if possible. Our landing at the array was met with Silence. We entered an empty facility and did a lot of investigation to find the 20 employees that normally man the location murdered and buried in the rail hub that connections the array to the major settlements. We carefully had swept for traps and our care was rewarded with some small devices that seemed to have been placed for men in armor. Mars is not a enviroment at this point you want to be exposed too. Ok as we complete the sweep and clear of the array we are attacked by some andriods of unknown manufacture. Not alien just not stuff we have seen before, the main objective of the attack is to destroy our VOTL craft and we wisely left a several squads covering them, so we do not suffer any craft loses and human casualties were light. So intresting start but we never played another game of it. The System was Bolt Action adapted to the space wars. The figures are Ground Zero Games, Khurasan Miniatures, and perhaps some I am not recalling. Its also possible that these pictures are from another game...As I look them over I wonder...